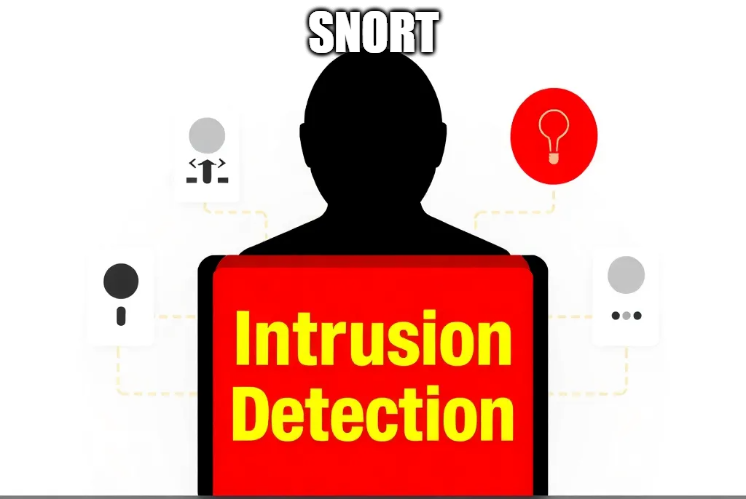
Intrusion Detection Systems (IDS) are critical for securing modern networks. Among the popular open-source IDS tools, Snort stands out for its flexibility, community support, and effectiveness. In this blog, we’ll walk you through setting up Snort—from installation to configuration—to monitor and protect your network against potential threats.
Table of Contents

Snort is an open-source network intrusion detection and prevention system (IDS/IPS) developed by Cisco Systems. It works by analyzing network traffic in real-time, identifying suspicious activities, and alerting administrators. With its extensive library of rules, Snort can detect various threats, including malware, port scans, and unauthorized access attempts.
Key Features of Snort
Protocol Analysis: Monitors network protocols to detect anomalies.
Content Searching/Matching: Scans packet payloads for specific patterns.
Detection Engine: Uses rules to identify potential threats.
Real-Time Alerts: Provides instant notifications for detected intrusions.
Prerequisites for Setting Up Snort
Before diving into the installation, ensure you have the following:
Operating System: Snort is compatible with various platforms, including Linux (Ubuntu, CentOS) and Windows. For this guide, we’ll focus on Ubuntu.
Root Access: Administrative privileges are required to install and configure Snort.
Network Interface: A dedicated network interface card (NIC) for monitoring traffic is recommended.
Dependencies: Tools like
gcc,make,libpcap, andlibpcreare essential for compiling Snort.
Step 1: Installing Snort
Follow these steps to install Snort on Ubuntu:
1. Update the System
Update your system packages to ensure you have the latest dependencies:
sudo apt update && sudo apt upgrade -y2. Install Required Libraries
Snort relies on several libraries. Install them using the following command:
bash
sudo apt install -y build-essential libpcap-dev libpcre3-dev libdnet-dev zlib1g-dev3. Download Snort
Download the latest Snort source code from the official website:
wget https://www.snort.org/downloads/snort/snort-2.9.X.tar.gz4. Extract and Compile
Extract the downloaded file and navigate to the Snort directory:
tar -xvzf snort-2.9.X.tar.gz
cd snort-2.9.X
Compile and install Snort:
./configure --enable-sourcefire
make
sudo
 make install
5. Verify Installation
Ensure Snort is installed by checking its version:
bash
snort -vStep 2: Configuring Snort
With Snort installed, the next step is to configure it for your network environment.
1. Set Up Configuration Files
Snort’s configuration file, snort.conf, is located in /etc/snort. If it’s not present, create the directory and move the default configuration file:
sudo mkdir /etc/snort
sudo cp /usr/local/etc/snort/snort.conf /etc/snort/
2. Define Network Variables
Edit snort.conf to specify your network settings. Open the file with a text editor:
sudo nano /etc/snort/snort.confModify the following variables:
HOME_NET: Define the IP range of your internal network, e.g.,
192.168.1.0/24.EXTERNAL_NET: Set this to any traffic outside your network, typically
!HOME_NET.
var HOME_NET 192.168.1.0/24
var EXTERNAL_NET !$HOME_NET
3. Enable Rule Sets
Snort rules are the heart of its detection capability. Download and place rule sets in the /etc/snort/rules directory. To enable a rule, uncomment or add its path in snort.conf:
include $RULE_PATH/local.rules
include $RULE_PATH/community.rules
4. Create a Logging Directory
Specify where Snort should log detected events:
sudo mkdir /var/log/snort
sudo chmod -R 755 /var/log/snort
Update snort.conf to point to this directory:
output alert_fast: /var/log/snort/alertsStep 3: Running Snort
Once configured, you can run Snort in different modes:
1. Test Configuration
Before starting Snort, test its configuration for errors:
snort -T -c /etc/snort/snort.conf2. Run Snort in IDS Mode
To monitor traffic and log alerts:
bash
sudo snort -c /etc/snort/snort.conf -i eth0
Replace eth0 with the appropriate network interface.
3. Analyze Logs
Snort logs events in /var/log/snort. Use tools like grep or custom scripts to analyze alerts:
bash
cat /var/log/snort/alertsBest Practices for Snort Configuration
Regular Updates: Keep Snort and its rule sets updated to protect against new threats.
Rule Customization: Modify existing rules or create custom rules tailored to your environment.
Testing: Regularly test configurations to ensure Snort functions as expected.
Integration: Combine Snort with other tools like SIEMs for comprehensive threat management.
A well-configured Snort setup is an essential layer of defense for any network. By adhering to these best practices, you can maximize Snort’s efficiency and ensure a proactive approach to network security.
Conclusion
Setting up Snort as an IDS is a cost-effective way to enhance your network security. By following this guide, you’ll have a robust system capable of detecting and alerting you to potential intrusions. Regularly update and fine-tune your Snort configuration to stay ahead of emerging threats.
For more advanced use cases, consider exploring Snort’s IPS capabilities or integrating it with visualization tools for better insights. A secure network starts with proactive measures, and Snort is an excellent tool to have in your arsenal.
Why Businesses Trust SecureMyOrg for Comprehensive Network Security
At SecureMyOrg, we uncover and fix all possible security vulnerabilities of mobile and web, while providing solutions to mitigate risks. We are trusted by renowned companies like Yahoo, Gojek and Rippling, and with 100% client satisfaction, you’re in safe hands!


Some of the things people reach out to us for –
- Building their cybersecurity program from scratch – setting up cloud security using cost-effective tools, SIEM for alert monitoring, building policies for the company
- Vulnerability Assessment and Penetration Testing ( VAPT ) – We have certified professionals, with certifications like OSCP, CREST – CPSA & CRT, CKA and CKS
- DevSecOps consulting
- Red Teaming activity
- Regular security audits, before product release
- Full time security engineers.
Relevant Posts

Top Cybersecurity Threats Facing Businesses In 2026
Businesses entering 2026 face a security landscape that is more complex, more interconnected, and far less forgiving than in previous years. Cybersecurity threats no longer

Top 5 Security Weaknesses Cloud-Native Apps Commonly Ignore
Cloud-native applications promise speed, flexibility, and scalability. Teams ship features faster, infrastructure adapts automatically, and operational overhead drops. Yet many organizations discover later that security

Why Weak Serverless Application Security Puts Your Business at Risk
Weak security in serverless environments often goes unnoticed until it leads to real damage. Misconfigured triggers, broad permissions, and poor visibility can expose sensitive data and disrupt business operations. Understanding where the risks appear is the first step toward building safer, more reliable serverless applications.

What Is Penetration Testing as a Service?
Penetration testing as a service (PTaaS) lets experts simulate real attacks to uncover vulnerabilities before hackers do. This guide explains the process, benefits, and costs, helping businesses strengthen defenses with predictable, ongoing security checks.

How To Inspect Encrypted Traffic Without Breaking Privacy
Network administrators face a challenge: securing systems while respecting privacy. This guide explains how to inspect encrypted traffic without breaking privacy using metadata, anomaly detection, and machine learning ensuring visibility, compliance, and trust.

How to Audit Infrastructure as Code (IaC) for Security Vulnerabilities
Discover how to audit Infrastructure as Code (IaC) for security vulnerabilities with this practical guide. Learn to scan IaC files using tools like Checkov, fix issues like exposed resources, and integrate audits into CI/CD pipelines. Protect your cloud systems from misconfigurations and ensure compliance with clear, actionable steps.
