Malware sandboxes are essential tools in cybersecurity, allowing security analysts to safely analyze and understand the behavior of malicious software. By setting up a controlled, isolated environment, organizations can detect and mitigate threats before they compromise critical systems. In this guide, we will walk through the process of setting up a malware sandbox for effective threat analysis.
What is a Malware Sandbox?

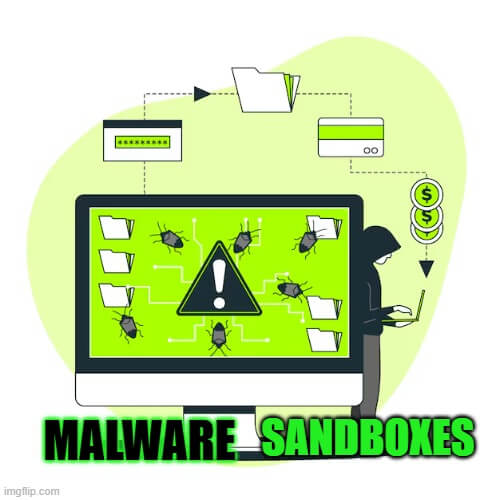
A malware sandbox is a virtualized or isolated environment where potentially malicious files can be executed and observed without harming the host system. These sandboxes help security professionals analyze malware behavior, including file modifications, network activity, and registry changes, to understand its impact and develop countermeasures.
Why Use a Malware Sandbox?
A properly configured malware sandbox provides several key benefits:
Safe Analysis Environment: Prevents malware from spreading to live systems.
Detection of New Threats: Identifies zero-day and polymorphic malware that traditional security tools might miss.
Automated Threat Intelligence: Integrates with security solutions to provide real-time threat insights.
Forensic Investigation: Helps in understanding malware techniques, tactics, and procedures (TTPs).
Prerequisites for Setting Up a Malware Sandbox
Before you begin, ensure you have the following:
Hardware Resources: A system with sufficient RAM and processing power for virtualization.
Virtualization Software: Platforms like VMware, VirtualBox, or QEMU for running isolated environments.
Operating System Images: Windows, Linux, or macOS VMs to simulate real-world environments.
Security and Analysis Tools: Install necessary monitoring and logging tools for tracking malware behavior.
Network Configuration: A secure, isolated network or VPN to prevent malware from affecting external systems.

Step 1: Choose a Virtualization Platform
To create a secure and isolated environment, use a reliable virtualization tool. Popular choices include:
VMware Workstation – Robust and widely used for malware analysis.
Oracle VirtualBox – Open-source and flexible for sandboxing needs.
KVM/QEMU – Preferred for Linux-based analysis environments.
Install the chosen virtualization platform and configure it to allow multiple virtual machines (VMs) for comprehensive analysis.
Step 2: Create a Virtual Machine
Once your virtualization software is installed, create a new VM with the following specifications:
Operating System: Windows (common malware target), Linux, or macOS.
RAM & CPU: Allocate at least 4GB RAM and multiple CPU cores for smooth execution.
Disk Space: Minimum 50GB storage to accommodate logs and malware samples.
Snapshot Support: Enable VM snapshots to restore the system quickly after analysis.
Step 3: Configure Network Settings
To prevent malware from communicating with external networks, configure a host-only or NAT-based network:
Host-Only Network: Ensures malware cannot access the internet but can communicate with analysis tools.
NAT (Network Address Translation): Limits external exposure while allowing internet emulation for analysis.
Use network monitoring tools like Wireshark to capture suspicious traffic.
Step 4: Install Analysis and Security Tools
A malware sandbox is only effective with the right tools for monitoring and logging. Recommended tools include:
Process Monitor (ProcMon): Tracks file and registry changes.
Wireshark: Captures and analyzes network traffic.
Autoruns: Detects persistent malware techniques.
Regshot: Compares registry changes before and after malware execution.
FakeNet-NG: Simulates network services to observe malware communication.
For Linux-based sandboxes, consider using Sysdig, Strace, and Snort for system and network monitoring.
Step 5: Implement Evasion Resistance Measures
Many modern malware variants detect sandbox environments and alter their behavior to avoid detection. Counter these techniques by:
Randomizing System Artifacts: Modify MAC addresses, registry values, and VM signatures.
Simulating User Activity: Use scripts to generate keystrokes, mouse movements, and file interactions.
Delaying Execution Analysis: Some malware uses time-based delays; ensure extended monitoring.
Step 6: Enable Logging and Monitoring
To effectively analyze malware, configure comprehensive logging:
Windows Event Logs: Capture security-related events.
Sysmon (Windows): Provides detailed process creation and network connection logs.
ELK Stack (Elasticsearch, Logstash, Kibana): Centralized logging for advanced analysis.
Splunk: Helps with real-time data monitoring and correlation.
Step 7: Execute and Analyze Malware Samples
Once the sandbox is ready, follow these steps to analyze malware:
Take a VM Snapshot: Ensure easy rollback in case of corruption.
Execute the Malware: Run the suspicious file while monitoring behavior.
Observe System Changes: Track file modifications, process activities, and network connections.
Collect Logs and Reports: Store logs for deeper forensic analysis and threat intelligence sharing.
Revert VM to Snapshot: Restore the VM to its original state before running another sample.
Step 8: Isolate and Contain Malware
To prevent accidental spread, ensure proper isolation:
Disable Shared Folders: Prevents malware from accessing host files.
Restrict Clipboard Sharing: Blocks data exfiltration between VM and host.
Use Non-Persistent VMs: Automatically resets the system after every analysis session.
Automating Malware Analysis
For large-scale analysis, consider automation frameworks:
Cuckoo Sandbox: Open-source malware analysis automation tool.
Joe Sandbox: Provides advanced, customizable automated analysis.
VMRay Analyzer: Detects evasive malware using hypervisor-level monitoring.
Conclusion
Setting up a malware sandbox is a crucial step in proactive cybersecurity, enabling organizations to detect, analyze, and mitigate threats effectively. By following these best practices—choosing the right virtualization software, configuring secure networks, installing monitoring tools, and implementing evasion-resistant measures—you can build a robust malware analysis environment. As cyber threats continue to evolve, a well-configured sandbox remains an essential tool in every security analyst’s arsenal.
-Also, read: How to Create a Sandbox Environment for Malware Analysis
Why Businesses Trust SecureMyOrg For Comprehensive Network Security
At SecureMyOrg, we uncover and fix all possible security vulnerabilities of mobile and web, while providing solutions to mitigate risks. We are trusted by renowned companies like Yahoo, Gojek and Rippling, and with 100% client satisfaction, you’re in safe hands!


Some of the things people reach out to us for –
- Building their cybersecurity program from scratch – setting up cloud security using cost-effective tools, SIEM for alert monitoring, building policies for the company
- Vulnerability Assessment and Penetration Testing ( VAPT ) – We have certified professionals, with certifications like OSCP, CREST – CPSA & CRT, CKA and CKS
- DevSecOps consulting
- Red Teaming activity
- Regular security audits, before product release
- Full time security engineers.
Relevant Posts

How To Inspect Encrypted Traffic Without Breaking Privacy
Network administrators face a challenge: securing systems while respecting privacy. This guide explains how to inspect encrypted traffic without breaking privacy using metadata, anomaly detection, and machine learning ensuring visibility, compliance, and trust.

How to Audit Infrastructure as Code (IaC) for Security Vulnerabilities
Discover how to audit Infrastructure as Code (IaC) for security vulnerabilities with this practical guide. Learn to scan IaC files using tools like Checkov, fix issues like exposed resources, and integrate audits into CI/CD pipelines. Protect your cloud systems from misconfigurations and ensure compliance with clear, actionable steps.

DevSecOps Best Practices: Integrating Security Early in Your CI/CD Pipeline
This article provides a practical guide to embedding security into every stage of your CI/CD pipeline. Learn core DevSecOps best practices like SAST, DAST, dependency scanning, secrets management, and compliance automation to catch vulnerabilities early, foster a culture of shared ownership, and build a secure-by-design development process that accelerates release cycles.

5 Cloud Misconfigurations That Lead to Data Breaches
Cloud misconfigurations are one of the leading causes of data breaches, yet they’re also among the most preventable. From exposed storage buckets to weak IAM policies, attackers exploit these mistakes daily. Learn about the top 5 misconfigurations and how your organization can fix them before they lead to costly data exposure.

How Can Ethical Hacking Training Elevate Your Internal Cybersecurity?
Ethical hacking training empowers organizations to strengthen internal cybersecurity by uncovering vulnerabilities before attackers do. From mastering penetration testing to enhancing incident response, this training builds a proactive security culture. Learn how Secure My ORG’s programs can elevate your team’s skills and fortify defenses against modern threats like AI-driven attacks.

AI‑Generated Malware: Threat or Hype?
AI-generated malware uses advanced algorithms to create adaptive and hard-to-detect threats, posing serious challenges for modern cybersecurity defenses. Unlike traditional malware, it can evolve on its own, learning how to bypass security systems without human input. As a result, cybersecurity teams must increasingly rely on AI-driven tools and strategies to detect and neutralize these sophisticated digital attacks.
